
Oh, look at my "2 posts every month" schedule! Half a month went by and the things I'm working on right now are moving too slow to have any results worth showing. Bad me. To make up, I decided to write about old stuff I've had on my mind for a while. That long rocky road we stumble on before completing a project. I usually try to sound optimistic and upbeat when I put a tutorial together and that may give the impression that I have a magic ability to do everything right effortlessly. Well, that's not exactly how it works in real life...
The idea for this post came after some Pinterest link-chasing when I landed on a Russian blog with scans from a Spanish book on dollhouse miniatures. I wish I could find that again and link to it. It was quite extraordinary. Steps after steps of photos with the same hands, same lighting, making miniature things with intricate details from scratch in various art mediums. On some level, I understood those were staged and studio lit, but a part of me couldn't help thinking I'd cut my right arm to have that person's left. Seriously, aren't you frustrated to see tutorials where it seems like the author gets through every step with perfect results from their first try? No? Just me? Anyway, that made me think of my own style. Do I also give people the wrong idea? I want to be honest about what it takes to achieve something, but at the same time I want to encourage people to try what I write about, because it's all doable and fun.
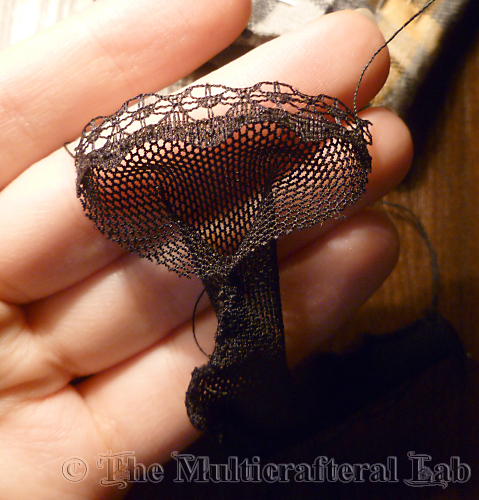
There are subtle clues in my photos that making a tutorial (or any crafty project) is not a smooth experience. First of all, there's the background. I carry my work around to three locations. The one where I have the most inspiration is the desk in my old room at mum's. It's the dark brown one with glue spots and a lamp. It makes for photos like this:
You'll know it by the pinkish light and terrible sharp contrasts. Sometimes there's food or a computer screen in sight.
 |
| That's the spot! |
Dad's office has a well lit plywood desk. This one:

Most of the other work surfaces, as well as the places with pretty wallpaper where I photograph dolls and finished stuff are in my house.

If a project travelled to different places between steps, you know it took more than one day to complete.
Another indicator of time lapse are my nails that sometimes show up in pictures. I do them every two weeks on average. If the colour changes twice in a post, at least two weeks have passed :)
Today I'll give you a glimpse into the making of a tutorial on the example of my quite famous spider shoes. You have everything there - different desks, different nails - to draw conclusions for yourselves. I, have one extra clue - the photo timestamps. I started putting everything together and the results surprised even me. I'd honestly forgotten it took me so long to finish those shoes! Here's a different look at the shoe story, broken down by days.
***
Before 29/03/2013 - Figured out how to make the sole and heel. Decided to make another pair shortly and document all steps while the method is fresh in my memory. I won't even describe my unsuccessful attempts to shape the heel with wood filler or glue-soaked cotton wool. I did mention all my early experiments in that first shoe post.
14/07/2013 - I took a photo of my design which I thought out a couple of days before. Dug out my bag of rhinestones, tried to match them for the spiders with no luck. One pair was proportional, but too big. One was the right size, but it was a half-pearl, not crystal. I measured the ones that were right and planned a trip to the Swarovski boutique (regular cheapo rhinestones in this size look terrible in macros). Keeping fingers crossed they'd have usable colours.
15/07/2013 - The only small dark rhinestones they had were gunmetal. Black would have been perfect but gunmetal is good! Wow, did I really find what I needed on the first try? Okay, bought several spares. Chose a beautiful poison green and bloody red for the bigger spider segment.
18/07/2013 - Started making the soles. Not wearing nail polish.

Oh, these aren't even the soles I ended up using. They got tossed away with the failed thread uppers. The soles on the finished pair had to be made anew at some point before the final cord uppers.
01/08/2013 - Struggled with the thread uppers. You know how that ended.
17/08/2013 - Took a piece of leather to dad's office, thinking I couldn't fail with a nicely drawn spider shape. I did. Another wasted day.

26/08/2013 - Returned to the thread idea, but looked for a different material. Found some shoelace-like thin cord at the store. Seems really nice, please make it work! On an unrelated subject, I washed Teresa's sticky hair with various cleaning solutions. Photos would later appear in the g(l)oo hair post.
27/08/2013 - At my parents', sick, celebrating Independence Day with m&m's in our flag colours. Weirdly enough, this was one of the most productive days, when I finally and successfully made shoe uppers that looked like spiders, missing only the rhinestones. I even made the thick sole sandwich. I'm wearing glitter nail polish that appears cracked already.
 |
| Now you know two useless facts about my country |
01/09/2013 - Even though the photos look the same as in the previous steps, I actually started making the heels on this day. I glued sticks and let them dry overnight.
02/09/2013 - Made the paper bases for the heels. Yay, so glad I still remembered how I made them the first time! Let everything dry thoroughly. Started to draw a pattern for a skirt (which, by the way, is still unfinished) some time along this step. So many glue layers, so much time to kill in between.
06/09/2013 - Much filing and smoothing. Decorated the ugly mess on the heel ribbon. Blue nail polish appears.

07/09/2013 - Finish line. Painted the soles and glued the rhinestones. OMG DID I REALLY?...
08/09/2013 - Took the final photos. Found many blunders, got depressed, decided to use them anyway.
13/09/2013 - Blogged the article. Made it look so breezy, didn't I? Now you know it took just about two months from design to tutorial post!
***
The moral of the story is: don't despair and don't give up when something doesn't turn out at once. Don't let other people's perfect photos discourage you. You can achieve what you want if you persevere. Maybe you need a different approach. Maybe your supplies aren't right for the job. It's quite rare that crafting something goes smoothly and without incidents. There is fun in trying, too, and with a lot of trying different things, eventually you'll succeed in your endeavour.
I went from not taking photos of anything to taking progress photos for tutorials to documenting everything I try. I'll include more pictures of failed attempts in the future. Some day we'll look back and have a good laugh about them. I don't want any of you to feel bad about messing up. You are crafting, and that makes you awesome regardless of the results. Keep it up.
The Black Kitty
(^^)~
I totally intimidated myself by purchasing The Art of Making Beautiful Fashion Doll Shoes. As one of the reviews points out, NOT for the beginner! I'm feeling more inspired at the moment than I have in a long time, but I have to keep reminding myself that I only have time (and money!) for a project or two at once. It's an ongoing process, and every bit of encouragement helps.
ReplyDeleteI only looked at the cover and it was enough to intimidate me! Imagine cutting tabs in that satin and gluing it without resorting to selling your soul or something O_O I think it's similar to the book I was talking about, with the Andalusian miniatures. It probably took years or even decades for the authors to write it, but still, this kind of books/tutorials are the biggest demotivators for me. I don't want to have this effect on people, hence my decision to include all kinds of stories in the future. I have to find the right balance between enough enthusiasm to inspire someone to follow my lead, and realistic assessment that screw-ups are more common than perfect outcomes.
DeleteWhat's that saying? "It's not the destination, it's the journey?" It takes me months to finish a project and sometimes I have to let go of one idea to start a new one. I agree, people just have to keep at it.
ReplyDeleteSo true! If all I cared about was the "destination", I would have lost all hope and motivation a long time ago. I suppose this feeling is more common than all these perfect tutorials would have us think.
DeleteI know how this goes. Most people I talk to online think my sewing attempts work perfectly the first time. The truth is I usually end up going through the drafting, try, corrections, try, toss the unusable attempt away, redraft, and repeat process several times before I end up with something that works. Crafting is about the journey to me. I just never remember to document that part.
ReplyDeleteMystic
I'm in the middle of a sewing project and I understand exactly what you're talking about! Inexperienced people (look who's talking) often think they can simply trace a pattern on the good fabric and later wonder why it's sticking up in weird places. I'm documenting the ugly parts now, our pain will be heard :)
DeleteOh God, the beginning of your post, I sooooo know what you mean! It IS very frustrating sometimes.. Remember in my previous comment (the one on snaps) I mentioned the tut I was working on, the rerooting one that was being postponed for ages? I posted part of it today, and as I was uploading the pics, I felt so frustrated (almost wanted to cry, and I'm so not a crybaby, but still..), I just wanted to delete all of them and start over. They were bad and dark, and poorly editted.. And I rerooted 4 and a half heads to take pics for that! Still, if I'd postpone it again, I wouldn't post it this year.. So I decided to post it anyway, and revisit it again when I'll have better light, tools, opportunity, etc. As I told you before, I don't mind trying things over and over, but when I did them a gazillion times and the results are still bad, then I do feel down.. And taking decent pics is really hard for me, specially now that days are darker and I have only one usable spot in the house to craft and take pics. Not to mention my pc screen shows colors even darker than they are (and I can't adjust it). So I roll my eyes and feel terrible for a while, then I tell myself that at least I did something.. But many times I just set them aside and don't come back for a good time. So, THANK YOU LOTS for the words of encouragement! <3 They mean so much you have no idea. Answering your question, you do not pass a wrong impression to me. I know you come across many rocks in your path (as in the beaded jewelry tut), and some of them have a very frustrating effect on you (I still remember your forum comments on perfeccionism, and an answer on another comment here, about not getting as many things done as you had planned). But still you keep trying and finding creative ways to go around problems! And the results are always great because you do not give up. So whenever I see your projects and posts, I always feel motivated to keep trying new things, and to keep going despite the rocks in the way. =) And this post came just in the day I needed it, thanks again! :D
ReplyDeleteIf my article helped at least one person, I know my time wasn't wasted! Many hugs! The words of encouragement came at the right time for you because it's ALWAYS the right time. I get lost at every stage of a project (as you could see in this post) and every little help can go a long way. Your reroot saga came at a good time too, because I'm working on two heads and I learnt some new things even though I've read a lot on the subject. Your pictures turned out fine. I forgot it's winter for you guys! I have the same problem with the brightness, photos look ok in Photoshop but darker in the browser. Add the low exposure I use because my hands are shaky... So I have to remember to turn the brightness up until it's ridiculously noisy, then filter the noise out. That usually works, except with that darn desk at mum's house where the lighting never gets along with the camera. "Sigh* We can't really fumble with a tripod when we're doing something that will glue fingers together or set the house on fire if we wait another second, can we? The one thing that keeps me writing is that wonderful saying: "Perfection gets in the way of efficiency" (or something like that, it's translated and I forgot who said it). I'm a terrible perfectionist, but I keep reminding myself that there will never be a time when everything is perfect and I could never post anything and connect to wonderful people if I let my perfectionism hold me back all the time. At first I intended to start posting only after I'd have a complete OOAK doll, that was back when I was on deviantArt. Guess what? She still doesn't have shoes. Yes, my posts aren't well written, yes, some of my projects are lame, but that's life, a work in progress and I shouldn't miss out on the fun of trying and screwing up. Neither should you or anyone. You'll always think there is something to fix in what you've written, but for someone else that's new useful information. Why would you keep it away from them?
DeleteThe day after I did the posts, I went back and re editted all the pics, after going to a neighbor and seeing they looked awfully light in a normal screen (mine is too dark and can't be adjusted). But now I can live with that. I don't know much about photo editting, I mostly crop and change brightness a bit, so sometimes it can get frustrating. And yeah, working on tricky projects and trying to pic them at the same time can be quite a challenge, to say the least! I agree with all you said, except that your post aren't well written (they REALLY are!) and some of your projects are lame (didn't see any that could fit in that category yet). I guess we always feel insecure in a way or another. As you said, we always think we could have done better. And this can even help us improve a bit, just as long as we don't let it get in the way of our fun. And as you said, there's also the others, people that are starting in this hobby and don't have a clue on how to do these things. I remember when I was starting every line of information was so important to me. So I'm sure our tuts mean a lot to other people, and they don't see all the "imperfections" that worry us. Hugs right back at ya! :D
DeleteI'm glad you see it that way! If it weren't for Hubby, I don't think any of my posts would ever escape from the drafts folder :D He's my "clueless" test subject who reads from the perspective of someone who has never played with dolls or beads or whatever I do. So whenever he says "I could never do that... but the instructions are clear", I breathe relieved, try to get the subject out of my head and concentrate on something productive. We need this kind of people to keep us real.
DeleteSo what's up with your unadjustable monitor? That sucks! Can't you hook the computer to a TV or something?
Ah,lucky you to have such a supportive hubby! <3 It's so cool that he does his best to help you, even if he doesn't share the same hobbies. ^^
DeleteMy monitor is older than the pc (the pc itself is far from new, so no way to connect it to a tv), and we got it already with this problem. It's not super dark, just enough to give me a wrong interpretation of some tones and lighting, but it's ok. As long as it still works, I'm happy enough. The colors only bug me when I have to post pics (if it's for tutorials I worry a lot more about them being good enough) or use them as reference. For all the rest, it works well enough. =)
First thanks for sharing your efforts and your successes. Remember, you do reach success in one way or another. Even if the thing is not as you expected, it just might not have been meant to be. That particular piece, I mean.
ReplyDeleteAs for the time it takes to complete a project, I can't imagine why anyone would fault you for that. I mean you not only took the time to create something, you also took photos and shared the how to do its. That's marvelously generous. I thank you for doing so. I think that that is what sticks for your audience: that you kept at it and produced something interesting or improved.
Now, I am behind on some posts I intended to share for this month. I have to gather the figures together and see that the online text has the right figures assigned to the right ethnicity and that the links work out. Some posts are more work than others. The cool thing is that your audience may - I hope, lol - will be appreciative and wowed by what you did.
Thanks for sharing.
Thank you for your support! I like reading useful posts myself an I'm glad that other people like you appreciate what I do. I'm working on several projects right now and they are coming to an end all at once, it seems... so I'm behind schedule this month, but next month should compensate :) I hope you work out your posts too. Links and credits are a pain to edit into the text, I feel you on that matter!
Deleteso smart idea! Nice shoes! I like them!
ReplyDeleteAww, thank you for your comments! The spider shoes are my favourite, I should push myself to make them in every doll size I own.
Delete